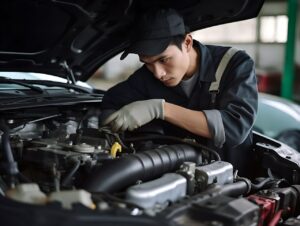
Car maintenance intimidates many drivers. The engine bay looks complex, the terminology is unfamiliar, and the fear of making something worse keeps people from opening the hood at all. But the truth is that most maintenance is simpler than it appears, and the small checks you perform regularly prevent the expensive problems that send cars to the shop.
In my years as a technician, I have seen the same pattern repeatedly: the cars that need the least expensive repairs are owned by drivers who spend 15 minutes each month looking at fluids, tires, and belts. The cars that need engines and transmissions are owned by drivers who never open the hood until a warning light forces them to.
This checklist is designed for beginners. No special tools required. No mechanical experience needed. Just a willingness to look, listen, and notice changes before they become crises.
Why Monthly Inspections Matter
Cars do not fail suddenly. They fail gradually, and the signs are visible if you know where to look. A slow coolant leak, a tire losing pressure, or a belt developing cracks are all early warnings that cost almost nothing to address. Left unchecked, they become $1,000 problems.
A monthly inspection takes 10 to 15 minutes. It builds your familiarity with your car’s normal condition, so you notice when something changes. It also creates a maintenance habit that extends your car’s life and reduces surprise repair bills.
The Monthly Inspection Checklist
1. Engine Oil Level and Condition
Why it matters: Oil lubricates, cools, and cleans the engine. Low or degraded oil causes accelerated wear, overheating, and eventual engine failure.
How to check:
- Park on level ground and wait 5 minutes after turning off the engine
- Locate the dipstick — usually a bright handle labeled “OIL” near the front of the engine
- Pull it out, wipe it clean with a rag, reinsert fully, then pull it out again
- Check the oil level against the “MIN” and “MAX” marks
- Observe the oil color: amber to dark brown is normal; black and gritty is overdue for change; milky or frothy indicates coolant contamination
What to do: If the level is near or below MIN, add the correct oil type. If the oil is black or gritty, schedule an oil change. If it is milky, see a mechanic immediately — this indicates a blown head gasket.
2. Coolant Level and Condition
Why it matters: Coolant prevents overheating, protects against freezing, and inhibits corrosion. Low coolant causes overheating, which destroys engines.
How to check:
- Locate the coolant reservoir — a translucent plastic tank with “MIN” and “MAX” lines
- Check the level when the engine is cold
- The fluid should be between MIN and MAX
- Observe the color: bright green, orange, pink, or blue is normal; rusty, oily, or dark indicates contamination
What to do: Add the correct coolant type if low. Never open the radiator cap when the engine is hot — pressurized steam can cause severe burns. If the level drops repeatedly, you have a leak that needs professional attention.
3. Brake Fluid Level
Why it matters: Brake fluid transmits hydraulic pressure from the pedal to the brakes. Low fluid indicates worn pads or a leak. Contaminated fluid reduces braking performance.
How to check:
- Locate the brake fluid reservoir on the master cylinder, near the firewall on the driver’s side
- The reservoir is usually translucent with MIN and MAX markings
- Check the level and color when cold
- Fluid should be clear to light amber; dark brown or black indicates contamination
What to do: Top off with the correct DOT-rated fluid if low. If the fluid is dark, schedule a brake fluid flush. If the level drops repeatedly, inspect for leaks or worn brake pads.
4. Tire Pressure
Why it matters: Underinflated tires reduce fuel economy, cause uneven wear, overheat, and increase blowout risk. Overinflated tires reduce traction and wear the center tread prematurely.
How to check:
- Use a digital tire pressure gauge for accuracy
- Check pressure when tires are cold, before driving
- Find the recommended pressure on the driver’s door jamb sticker, not the tire sidewall
- Check all four tires, including the spare if accessible
What to do: Inflate to the recommended pressure. Check monthly and before long trips. Pressure drops about 1 PSI for every 10 degrees of temperature decrease, so winter checks are especially important.
5. Tire Tread and Condition
Why it matters: Tread channels water away from the tire surface. Worn tread increases hydroplaning risk and extends stopping distances. Damaged tires can fail catastrophically.
How to check:
- Insert a quarter into the tread groove — if you can see the top of Washington’s head, tread is below 4/32 inch and replacement is recommended
- Look for uneven wear patterns: one-sided wear, cupping, or feathering
- Inspect sidewalls for cracks, bulges, cuts, or exposed cords
- Check for embedded nails, screws, or other objects
What to do: Replace tires when tread reaches 4/32 inch, or immediately if you see bulges, exposed cords, or deep sidewall damage. Uneven wear indicates alignment or suspension issues that need professional diagnosis.
6. Lights and Signals
Why it matters: Non-functional lights create safety hazards and can result in traffic citations. Other drivers cannot anticipate your movements if they cannot see your signals.
How to check:
- Turn on headlights and verify both low and high beams work
- Test turn signals front and rear, left and right
- Check brake lights by pressing the pedal while a helper observes, or by backing up to a reflective surface
- Verify reverse lights, license plate lights, and hazard flashers
- Check interior dashboard lights and dome lights
What to do: Replace burned bulbs immediately. Most are inexpensive and easy to change. If multiple lights fail simultaneously, check fuses before replacing bulbs.
7. Windshield Wipers and Washer Fluid
Why it matters: Visibility is critical for safety. Worn wipers streak and skip, reducing visibility in rain. Empty washer fluid leaves you unable to clean the windshield when needed.
How to check:
- Inspect wiper blades for cracks, splits, or hardened rubber
- Test wipers on a wet windshield — they should clear smoothly without streaking or chattering
- Check washer fluid reservoir level and top off with appropriate fluid
- Test washer spray pattern — it should cover the windshield evenly
What to do: Replace wiper blades every 6 to 12 months, or when they streak or skip. Use winter-rated washer fluid in cold climates to prevent freezing.
8. Battery Condition
Why it matters: A weak battery strands you unexpectedly. Batteries typically last 3 to 5 years, but extreme temperatures and short trips shorten life.
How to check:
- Inspect terminals for white or green corrosion
- Check that the battery is securely mounted and not loose
- Look for swelling or cracks in the battery case
- Check the manufacture date on the label — batteries older than 3 years should be tested regularly
What to do: Clean corrosion with a wire brush and baking soda solution. If the battery is over 4 years old or shows signs of weakness, have it tested at an auto parts store. Most offer free testing.
9. Belts and Hoses
Why it matters: The serpentine belt drives critical components: alternator, power steering pump, water pump, and air conditioning compressor. Coolant hoses carry pressurized fluid that prevents overheating. Failure of either strand you or damages the engine.
How to check:
- Inspect the serpentine belt for cracks, fraying, glazing, or missing chunks
- Press on coolant hoses — they should feel firm and spring back, not mushy or brittle
- Look for bulges, soft spots, or leaks at hose connections
- Check hose clamps for corrosion and tightness
What to do: Replace the serpentine belt if you see cracks or significant wear. Replace hoses that feel mushy, have bulges, or show leaks. These are relatively inexpensive preventive repairs that prevent expensive breakdowns.
10. Fluid Leaks Under the Car
Why it matters: Leaks indicate failing seals, gaskets, or components. Small leaks become large leaks. Some leaks create safety hazards or damage other systems.
How to check:
- Look under the car where you normally park
- Fresh leaks are wet and have color; old leaks leave stains
- Identify the fluid by color and location:
| Fluid Color | Likely Source | Urgency |
|---|---|---|
| Black or dark brown | Engine oil | Monitor; schedule repair if worsening |
| Red or pink | Transmission or power steering | Schedule repair soon |
| Green, orange, or pink | Coolant | Schedule repair soon; monitor temperature |
| Clear or light brown | Brake fluid or condensation | Urgent if brake fluid; normal if condensation |
What to do: Note any new leaks and monitor them. If a leak worsens or you notice a corresponding fluid level drop, schedule professional diagnosis. Small seepage is common on older cars; active dripping needs attention.
11. Exterior Lights and Reflectors
Why it matters: Broken or dirty lights reduce visibility and create safety hazards. Reflectors help other drivers see your vehicle at night.
How to check:
- Walk around the car and verify all lights function
- Clean headlight lenses if they are cloudy or yellowed
- Check that reflectors are intact and not faded
- Verify license plate is clean, legible, and properly illuminated
What to do: Replace burned bulbs, clean lenses, and repair damaged reflectors. Cloudy headlights can often be restored with polishing kits rather than expensive replacement.
12. Emergency Equipment
Why it matters: Breakdowns happen. Being prepared reduces stress and keeps you safe while waiting for help.
How to check:
- Verify spare tire is present, properly inflated, and the jack and lug wrench are accessible
- Check that the tire iron fits your lug nuts — some cars use locking lug nuts requiring a special key
- Ensure jumper cables or a portable jump starter is in the trunk
- Verify emergency reflectors or flares are present
- Check first aid kit supplies and expiration dates
- Ensure a flashlight with working batteries is available
What to do: Replace or replenish any missing or expired items. Consider adding a portable tire inflator and a basic tool kit for roadside emergencies.
Seasonal Additions to the Monthly Checklist
Winter Preparation
- Antifreeze protection: Verify coolant protects to at least -30°F using a tester from an auto parts store
- Battery test: Cold weather reduces battery capacity. Test before winter; replace if marginal
- Wiper blades: Install winter-rated blades that resist ice buildup
- Washer fluid: Switch to winter-rated fluid that will not freeze
- Tires: Consider winter tires if temperatures regularly drop below 45°F
- Emergency kit: Add blankets, warm clothing, and non-perishable snacks
Summer Preparation
- Air conditioning: Test performance before heat waves arrive
- Cooling system: Inspect hoses, radiator, and water pump for leaks
- Tire pressure: Hot pavement increases blowout risk — check pressure more frequently
- Oil level: Engines run hotter in summer; low oil increases wear risk
- Emergency water: Keep extra water in the car for overheating or personal hydration
How to Track Your Inspections
Consistency is the key to effective maintenance. Use one of these methods to track your monthly checks:
- Paper log: Keep a notebook in the glove compartment with dated entries
- Smartphone notes: Use a notes app with a recurring monthly reminder
- Maintenance app: Apps like Carfax Car Care or Drivvo track maintenance and send reminders
- Spreadsheet: Create a simple spreadsheet with dates, findings, and actions taken
The method does not matter. What matters is that you do it every month and act on what you find.
When to See a Professional
Monthly inspections are for monitoring, not diagnosing. See a mechanic when:
- Fluid levels drop repeatedly despite topping off
- Warning lights illuminate on the dashboard
- Unusual noises, vibrations, or smells develop
- Tire wear is severely uneven
- The car handles differently or pulls to one side
- Brake pedal feel changes
- Any inspection item concerns you, even if you cannot identify the cause
Trust your instincts. If something feels wrong, it probably is. Early professional diagnosis is always cheaper than delayed repair.
Bottom Line
Car maintenance does not require mechanical expertise. It requires attention and consistency. The monthly checklist in this guide takes 15 minutes and covers the systems that cause the most expensive failures when neglected.
Start this month. Open your hood, check your fluids, inspect your tires, and test your lights. Notice what is normal for your car. Repeat next month. Within a few cycles, you will know your vehicle better than most owners, and you will catch problems while they are still small and cheap to fix.
The best mechanic is the one who never needs to see you because you prevented the problem before it started.
Related Reading
Understanding your warning lights is essential for catching problems early. Learn what to do when your check engine light comes on: Why Your Check Engine Light Is On and What You Should Do First.
Disclaimer: This article is for informational purposes only. Always consult a certified mechanic for professional diagnosis and repair. Oriola Car Insights is not responsible for damage or injury resulting from maintenance performed based on this content.

The Oriola Cars Editorial Team creates and reviews practical automotive content about vehicle ownership, maintenance, used-car buying, safety, insurance and everyday driving costs.